If you’re utilizing iPads for surveys, event registration or lead capture, you’ll want to make sure each iPad stays locked to a specific app. You certainly don’t want users to be accidentally directed away from your content or searching the web instead of filling out a survey.
Although there are a number of apps available to lock an iPad into Kiosk Mode (we like KioskPro), perhaps the easiest way is to use Guided Access in iOS. There is no purchase or download required, and every iPad automatically comes with this option! Read on for a quick guide on using this universal iPad feature.
I. Enable Guided Access in iPad Settings
- Open Settings.
- Go to Accessibility.
- Tap on Guided Access (located in the General section – scroll down)
- Turn the switch to ON.
- Tap on Passcode Settings and then Set Guided Access Passcode.
- Enter a passcode (you’ll need this passcode to exit Guided Access once activated).
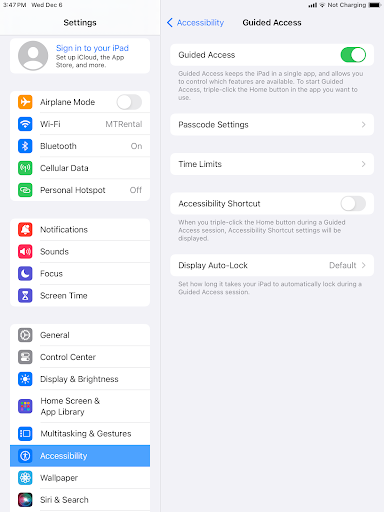
Guided Access in iPad Settings
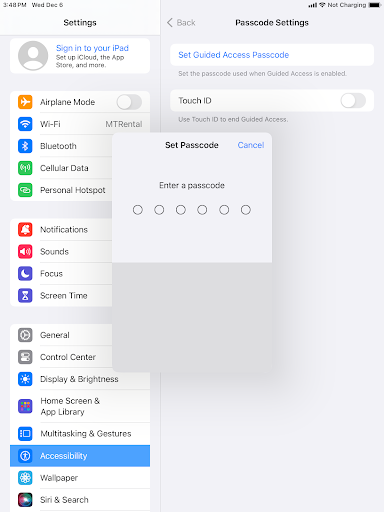
Guided Access Passcode
II. Configure Guided Access to Lock an App or Website
- Open the app you’d like to lock in kiosk mode (we’re using Square POS in these screenshots).
- Triple-click the iPad home button while in the app. This will activate the Guided Access menu.
- (Optional) Tap on Options to enable/disable the sleep/wake button, volume buttons, motion, keyboards, and to set a time limit. Once the time limit is reached, the user will be prompted to re-enter the password.
- (Optional) You can also disable functionality on any portion of the screen by circling it while in the Guided Access menu. (This is helpful when you want to disable a button, link, or the address bar of a web browser, for example.)
- When ready, tap on Start in the top right to activate Guided Access. You’re now in “kiosk mode”!
- To Exit kiosk mode, Triple-click the iPad home button, enter your Guided Access passcode and tap End in the top left. If you’d prefer to resume kiosk mode, tap Resume.
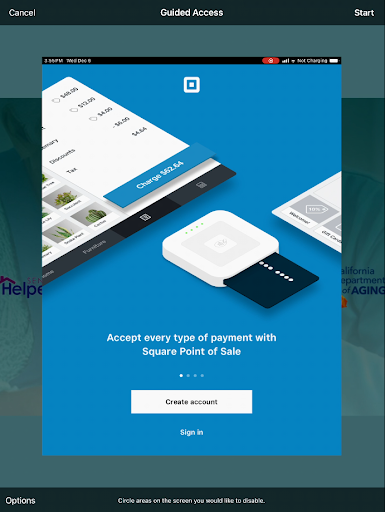
The Guided Access Start Menu
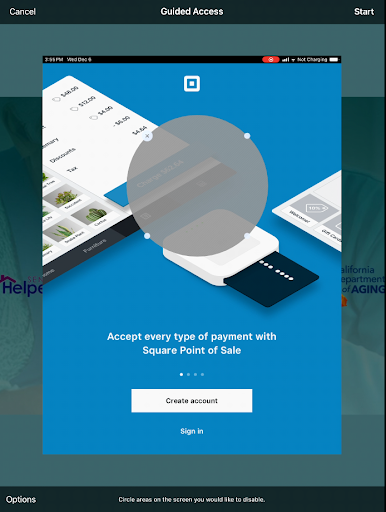
Touch Area Restrictions
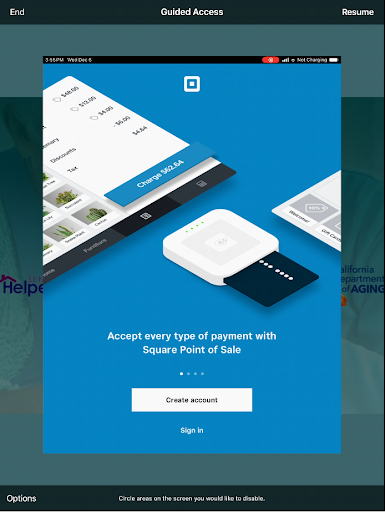
The Guided Access End or Resume Menu
Related Articles
- How to Connect a Mac to a Projector
- How to Connect a Laptop to a Projector
- Laptop Computer Video Output Guide
- 6 Tips for Preventing AV Failures
- 8 Reasons to Consider Using an Outside AV Provider
- 9 Cool & Creative Ways to Use a Projector
- Questions AV Companies Should Ask
- BYO AV: You Don’t Have to Use the Hotel’s Audio Visual Company
Meeting Tomorrow offers bulk iPad rentals in every generation and connectivity type. We also offer iPad kiosk rentals, as well as imaging services and customization on any number of iPads. Call 1-877-633-8866 for a custom quote!