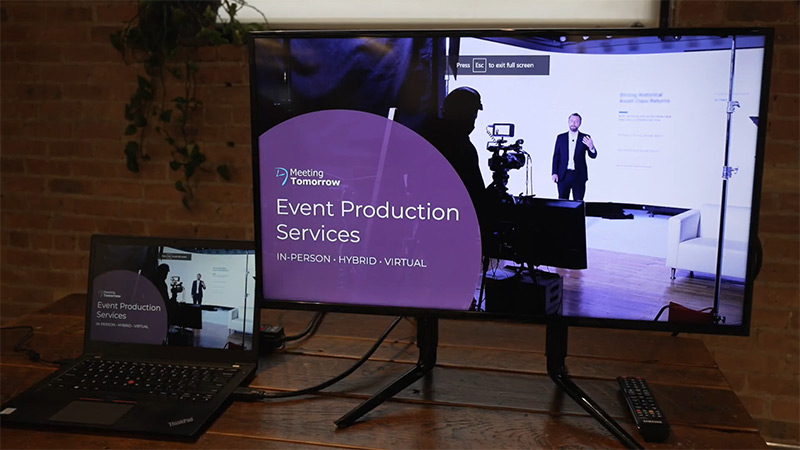
While connecting your laptop to a TV screen is relatively simple, not every setup is identical and issues can always arise. We created this guide to help meeting planners quickly connect their laptop and troubleshoot common audio and image problems for PC, Mac, and Chromebook laptops. Just watch the video tutorials and view the text instructions below!
Click the anchor link below for your laptop type:

Steps for Connecting a PC Laptop to a TV
1. Turn ON your PC laptop.
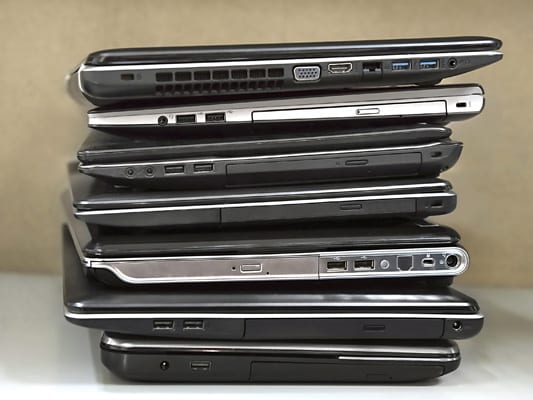
2. Connect the video cable (usually HDMI ![]() ) going from your laptop to the TV’s external video port. Depending on your laptop model, you may need an adapter to connect, for example, from the VGA port on your laptop to the HDMI port on the TV.
) going from your laptop to the TV’s external video port. Depending on your laptop model, you may need an adapter to connect, for example, from the VGA port on your laptop to the HDMI port on the TV.
(Unsure what video output you have? View our laptop video connection guide.)
3. Plug in the TV monitor into an electrical outlet and press the power ![]() button on the TV or remote to turn it ON.
button on the TV or remote to turn it ON.
4. Your laptop should automatically detect the TV, but If your laptop image does not pop up on the TV screen right away you should check that your TV is set to the correct input, or source. To check the source use either the TVs remote control or the physical menu button on the TV itself and select the “Input” or “Source” option. Select the option that matches the label for the port that you plugged your cable into on the TV. For most TVs this will likely be HDMI 1, or HDMI 2.
5. If your image is still not displaying on the TV after setting the source check the display mode on your laptop. Press the Windows key ![]() + P to quickly switch through the different display modes. Duplicate is the most common mode and displays exactly what is shown on your laptop screen.
+ P to quickly switch through the different display modes. Duplicate is the most common mode and displays exactly what is shown on your laptop screen.
(Note: Depending on your computer, you may have to use a different shortcut than listed above. You can always open the display settings from the start menu.)
6. If your laptop doesn’t automatically detect the TV, you may be able to go to your device’s Display Settings and prompt it to Detect displays. If your TV still doesn’t show up, check your cables and connections.
7. If you are using a VGA cable from your laptop and need audio for your presentation, connect the laptop’s audio out ![]() port to the TV. To use a different sound system, you will need to use an audio cable no matter what cable you use to connect the laptop and TV.
port to the TV. To use a different sound system, you will need to use an audio cable no matter what cable you use to connect the laptop and TV.
Steps for Connecting a MacBook to a TV
1. Turn ON your Apple MacBook.
2. Plug in the TV monitor into an electrical outlet and press the power ![]() button to turn it ON.
button to turn it ON.
3. Connect the video cable (usually USB-C or HDMI ![]() ) from the Mac to the TV. In order to do this, you will most likely need a Mac adapter cable that will connect the USB-C port to the HDMI cable connected to your TV.
) from the Mac to the TV. In order to do this, you will most likely need a Mac adapter cable that will connect the USB-C port to the HDMI cable connected to your TV.
(Note: Adapters vary depending on your computer’s video inputs. View our Apple adapter guide here.)
4. Your Mac should automatically detect the TV, but If your laptop image does not pop up on the TV screen right away you should check that your TV is set to the correct input, or source. To check the source use either the TVs remote control or the physical menu button on the TV itself and select the “Input” or “Source” option. Select the option that matches the label for the port that you plugged your cable into on the TV. For most TVs this will likely be HDMI 1, or HDMI 2.
5. If your laptop image is still not appearing on the TV, press the option/alt key ![]() + F1
+ F1 ![]() to access the Display Preferences. On newer Macs you can click & hold on the projector in the display arrangement to change modes. Mirror is the most common mode and displays exactly what is shown on your laptop screen. On older Macs, you can check the Mirror Displays box in the Arrangement tab.
to access the Display Preferences. On newer Macs you can click & hold on the projector in the display arrangement to change modes. Mirror is the most common mode and displays exactly what is shown on your laptop screen. On older Macs, you can check the Mirror Displays box in the Arrangement tab.
(Note: Depending on your computer, you may have to use a different shortcut than listed above. You can always access Display Settings by opening System Preferences in the Apple menu.)
6. If your Mac doesn’t automatically see the TV, open the Display Preferences (option/alt key ![]() + F1
+ F1 ![]() ), hold down option and click the Detect Displays button that appears at the bottom of the window. If your TV still doesn’t show up, check your cables and connections.
), hold down option and click the Detect Displays button that appears at the bottom of the window. If your TV still doesn’t show up, check your cables and connections.
Steps for Connecting a Chromebook to a TV
1. Turn ON your Google Chromebook.
2. Plug in the TV monitor into an electrical outlet and press the power ![]() button to turn it ON.
button to turn it ON.
3. Connect the video cable (usually HDMI ![]() , but could also be a DisplayPort, DVI, or VGA port) from the Chromebook to the TV. Depending on your Chromebook model you may need an adapter to connect, for example, from the DisplayPort on your Chromebook to the HDMI port on the TV.
, but could also be a DisplayPort, DVI, or VGA port) from the Chromebook to the TV. Depending on your Chromebook model you may need an adapter to connect, for example, from the DisplayPort on your Chromebook to the HDMI port on the TV.
(Note: Adapters vary depending on your computer’s video inputs. View our laptop video connection guide.))
4.Your Chromebook should automatically detect the TV, but If your Chromebook image does not pop up on the TV screen right away you should check that your TV is set to the correct input, or source. To check the source use either the TVs remote control or the physical menu button on the TV itself and select the “Input” or “Source” option. Select the option that matches the label for the port that you plugged your cable into on the TV. For most TVs this will likely be HDMI 1, or HDMI 2.
5. If your image is still not displaying on the TV after setting the source check the display mode on your Chromebook. To do this click on the time in the bottom right of the screen and in the “Device” section select “Displays”. Mirror Built-in Display is the most common mode and shows on the TV exactly what is shown on your Chromebook screen.
5. If you are using a VGA cable from your lChromebook and need audio for your presentation, connect the Chromebook’s audio out ![]() port to the TV. To use a different sound system, you will need to use an audio cable no matter what cable you use to connect the Chromebook and TV.
port to the TV. To use a different sound system, you will need to use an audio cable no matter what cable you use to connect the Chromebook and TV.
Related Articles
- How to Connect a Laptop to a Projector
- How to Connect a Mac to a Projector
- Laptop Computer Video Output Guide
- Apple MacBook Video Adapter Guide
- 6 Tips for Preventing AV Failures
- 8 Reasons to Consider Using an Outside AV Provider
- 9 Cool & Creative Ways to Use a Projector
- Questions AV Companies Should Ask
- BYO AV: You Don’t Have to Use the Hotel’s Audio Visual Company
Want more helpful event AV tips? Download our free eBook, “AV 101 for Meeting Planners and Event Professionals.”
Meeting Tomorrow provides meeting and event planners with AV and event technology services including laptop computer rental solutions, TV screen rental solutions, and iPad rental solutions.

The Meeting Tomorrow Team is a group of event-obsessed planners, producers, designers, creatives, and event tech experts who love bringing fresh ideas and flawless execution to every project. With decades of combined experience across planning, production, and creative, we write about the trends, tips, and behind-the-scenes know-how that help event professionals shine. Whether it’s sharing practical advice or spotlighting the people and stories that inspire us, our goal is to make planning extraordinary events easier.